
LCDT Online Quick Start Guide
Download the LCDT User Manual and Quick Start PDF's on our Downloads Page
LCDT Interface
The LCD Terminal can be used to review flight data, adjust settings, and perform diagnostics on your RRC3, RRC3+, or RTx GPS. It’s a handy way to interact with your unit at the field vs. lugging out your laptop PC.
Connecting the LCD
Before connecting the LCD module, be sure that the RRC3, RRC3+ or RTx/GPS unit is powered
off.
The LCD module connects to the unit via the ribbon cable included with the LCD. The connectors on the ends of the cable are identical, and either can be connected to either device. The connectors are keyed, to prevent the cable from being plugged in backwards.
After connecting the LCD, apply power to the unit, at which point you should hear three quick beeps from the piezo, and see the animated startup screen display on the LCD. (Note: If connecting to the RTx/GPS Unit, tap the Program Button immediately after power up to invoke the LCD Menu Mode).
The startup screen should appear similar to the following:
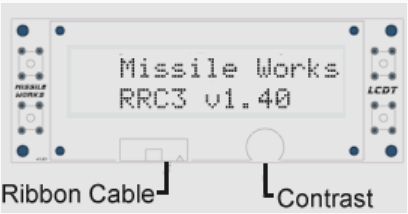
If the display is difficult to read, you can adjust the contrast by turning the knob to the right of the cable connector on the LCD unit. Please note that the LCD is not backlit, so it will be difficult, if not impossible, to read in poor lighting. When using 1S LiPO Battery Power, you may require a high contrast setting.
Navigating the LCD Menus
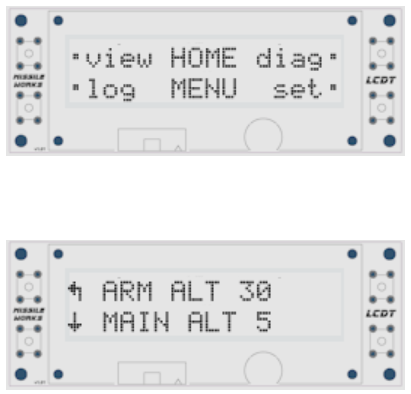
The LCD navigation is based around the four buttons on each side of the display. The center of the display shows the subject, and by each button is an icon or word, describing the button’s action. Some Menus may include special icons as well to indicate navigation or specific functions. See a few examples below:
It is highly recommended that you download the complete LCDT User Manual from the Missile Works Web Site “Downloads” page https://www.missileworks.com/downloads for a complete explanation of LCDT operations.
